

BMW R80RT Badlands Cafe Racer Project Part 2

BMW R80RT Badlands Cafe Racer Project Part 2
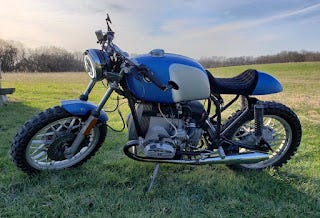
In Part 1 of the MajorPandemic BMW R80RT Badlands Cafe Racer Project the background of the project was covered on why I choose the BMW R80 Airhead. Take a look at the previous Part 1 article here. In this article I will cover the interim status of the project, cost and the specific upgrades.
